Installing the Selenium IDE Plugin
We will primarily use the Google Chrome browser for this job. If Chrome is not installed on your system, download it first and complete the installation.
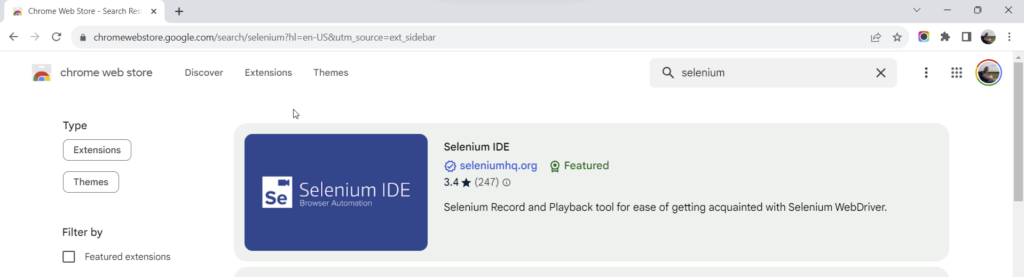
To download “Selenium IDE”, visit “https://chromewebstore.google.com/”.
Find the “Selenium IDE” plugin by typing “Selenium” in the search box.
Click on the “Selenium IDE” plugin to go to the detail page.
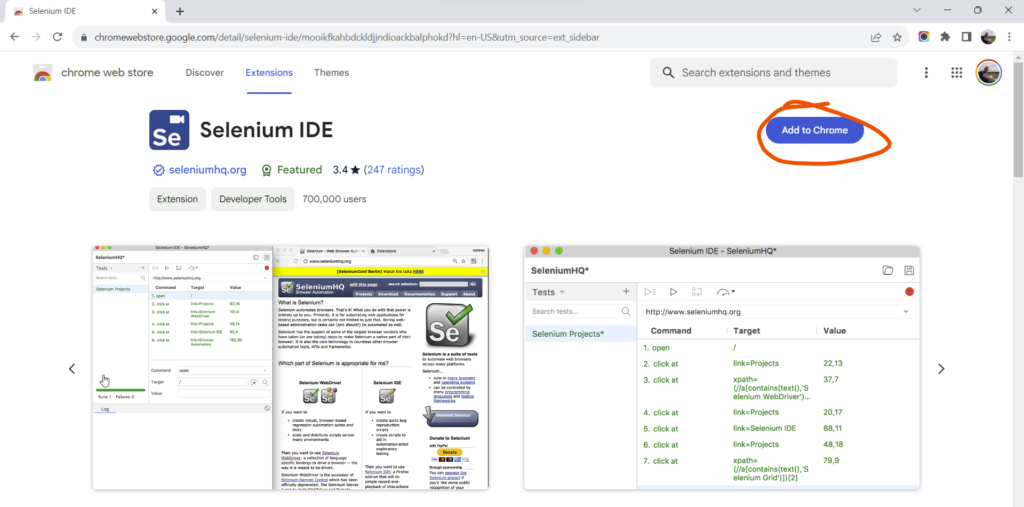
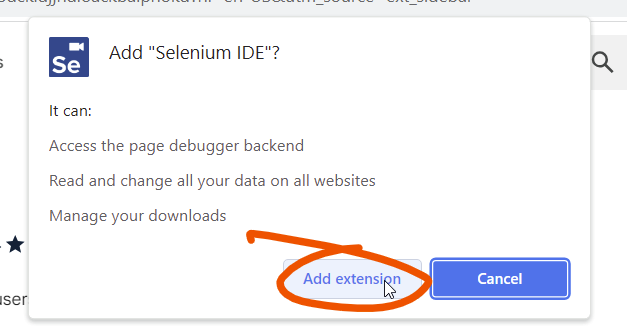
After clicking “Add to chrome”, complete the installation by clicking “Add extension” in the checkbox that opens.
Once the installation is complete, the shortcut will be added automatically.
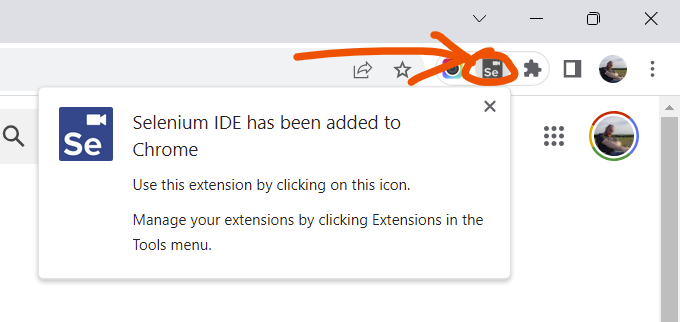
If the shortcut is not available, you can pin the shortcut in the menu that opens by clicking on the icon shaped like a puzzle piece.
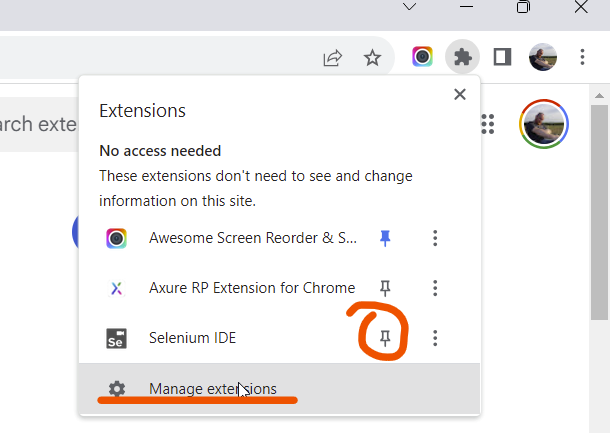
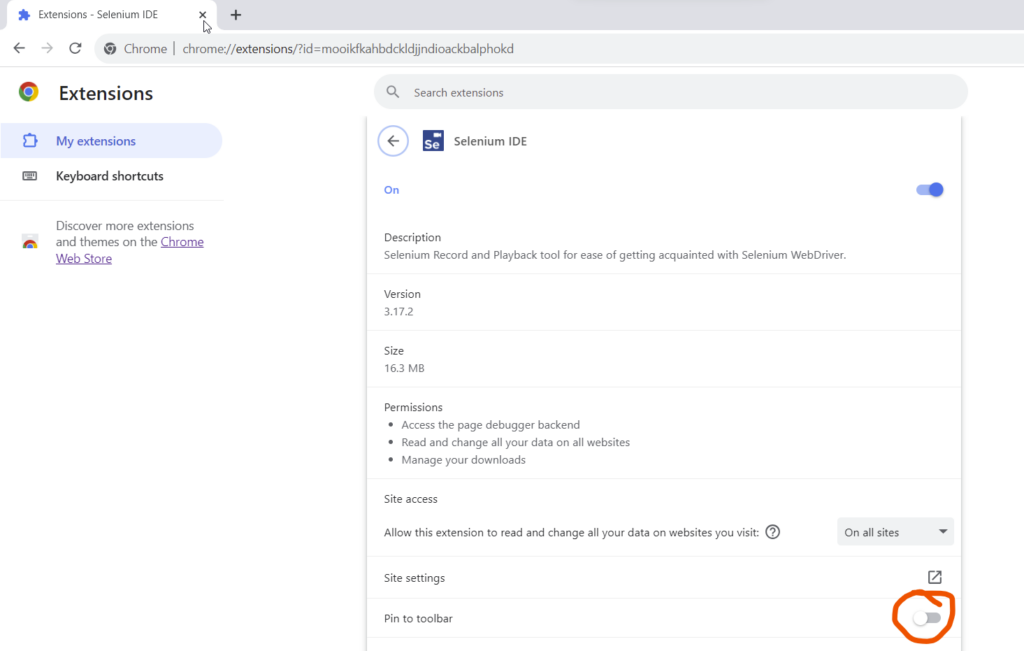
Or, by typing “chrome://extensions/” in the address bar, you can reach the screen where add-ons are managed, manage the add-on from there, and pin the shortcut to the toolbar.
Getting Ready
You can prepare the information on the form to be filled in advance and save it in a text file. Image to be uploaded etc. If there are files, keep them ready somewhere on your computer, for example in the “Downloads” folder. It would be even better to create a folder on the desktop or C: disk and keep the information and documents ready there to prevent accidental deletion or relocation. It will be practical for future uses to keep all files together by placing the form filling record to be made in the following steps in this folder.
Automating the Form
You can open the start screen by clicking on the Selenium icon.
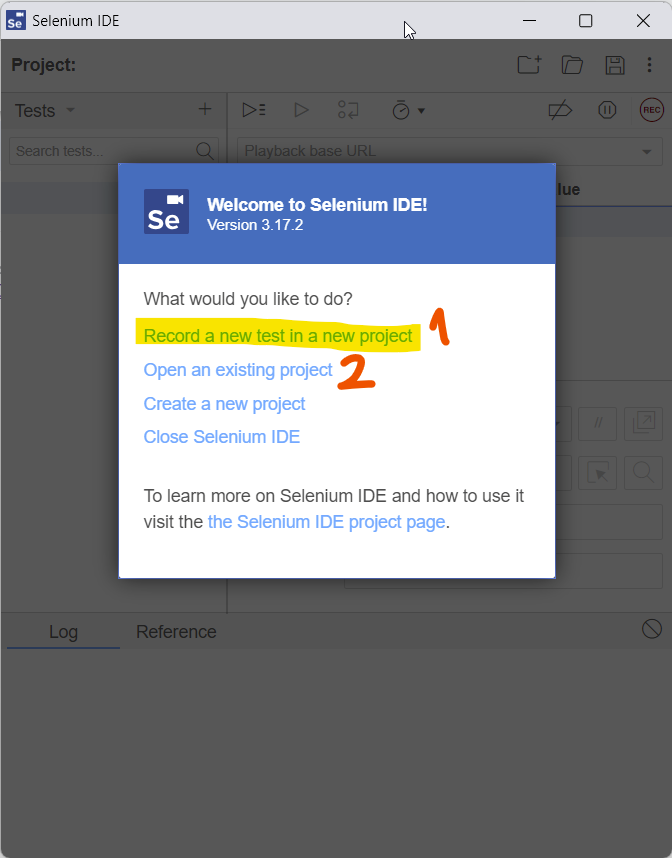
For option #1, you can start creating a test within a new project. Once the creation process is complete, option 2 can be used to access the created test later.
Creating a Test Record
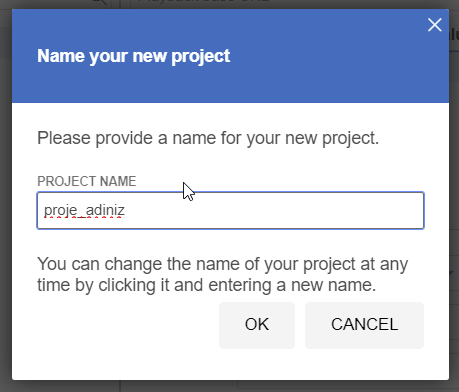
We write the project name of our choice and click the OK button.
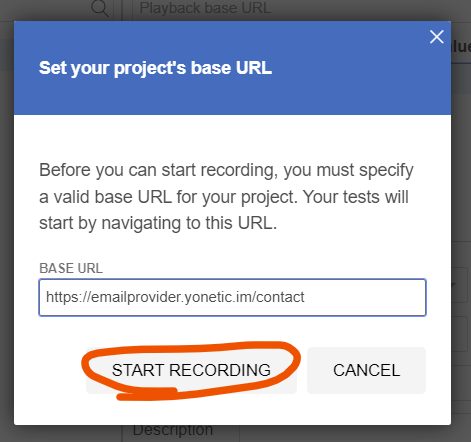
The address of the page where the form to be filled is written in the BASE URL field. For example, we will automatically fill out and send the contact form at “https://emailprovider.yonetic.im/contact”. After writing the address, press the “START RECORDING” button.
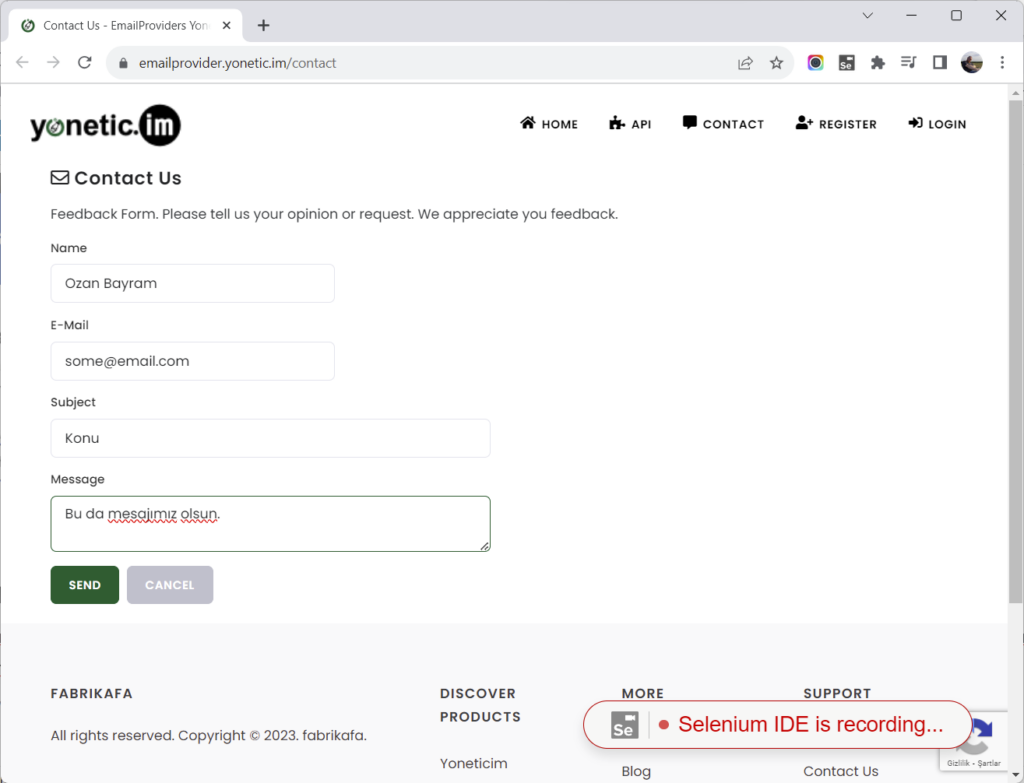
After the registration process begins, the form fields are filled in as we wish. Click on the Send button.
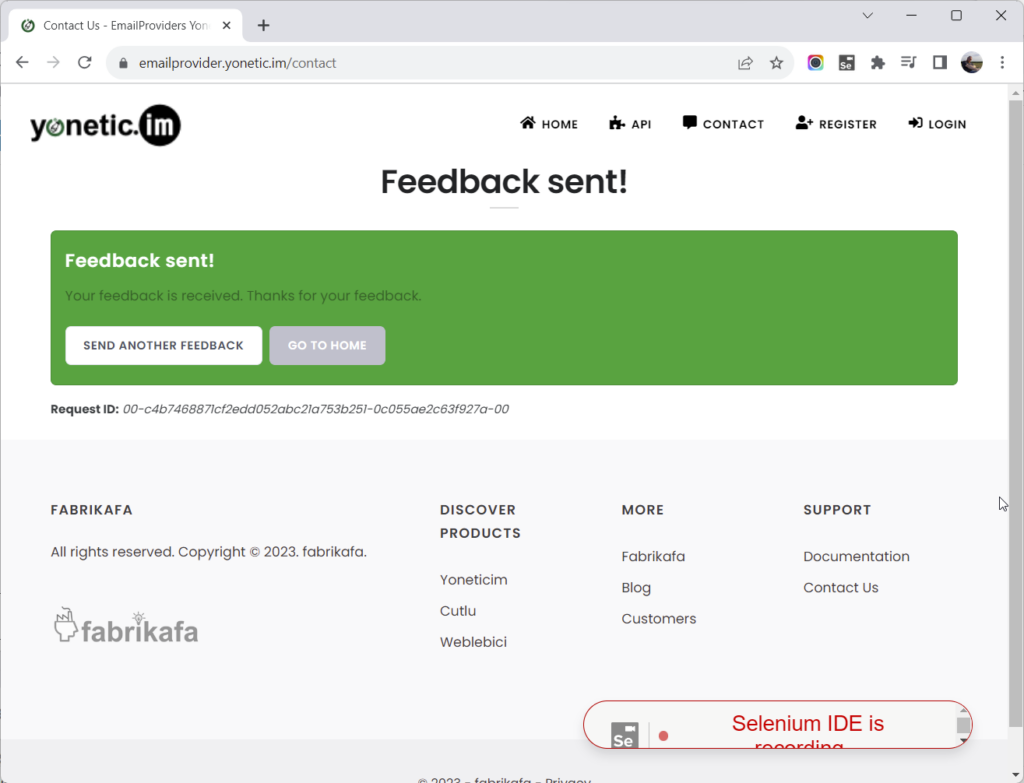
After the sending process is completed, you will return to the registration screen.
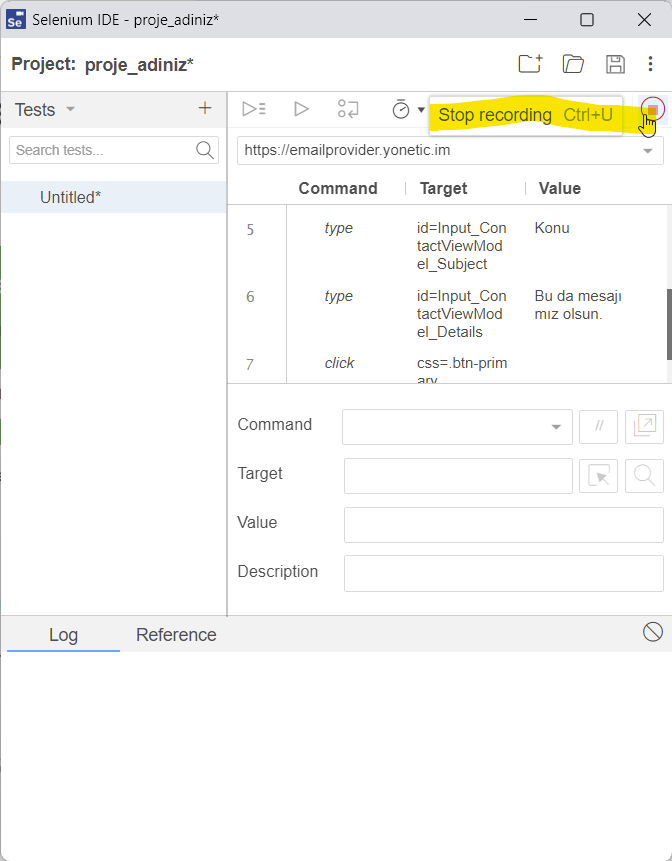
The recording process is stopped on the recording screen.
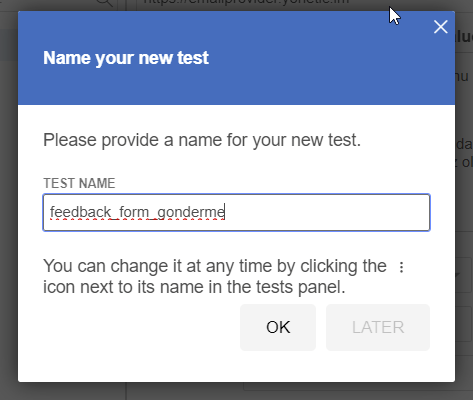
After recording is stopped, you will be asked to provide a name for the recording. After typing the name, click on the OK button and the autofill process is completed.
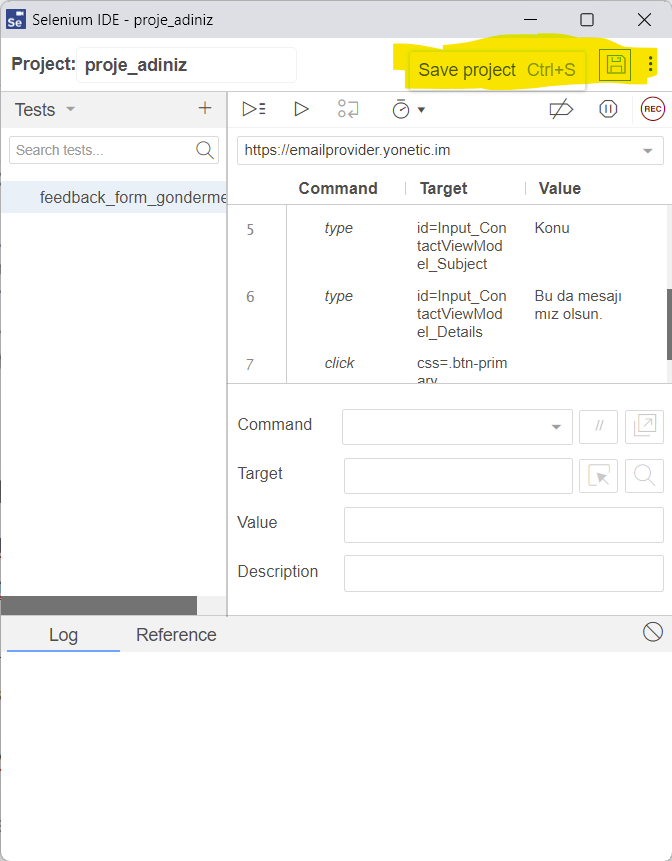
As the last step, you can save the project containing the recording process to your computer.
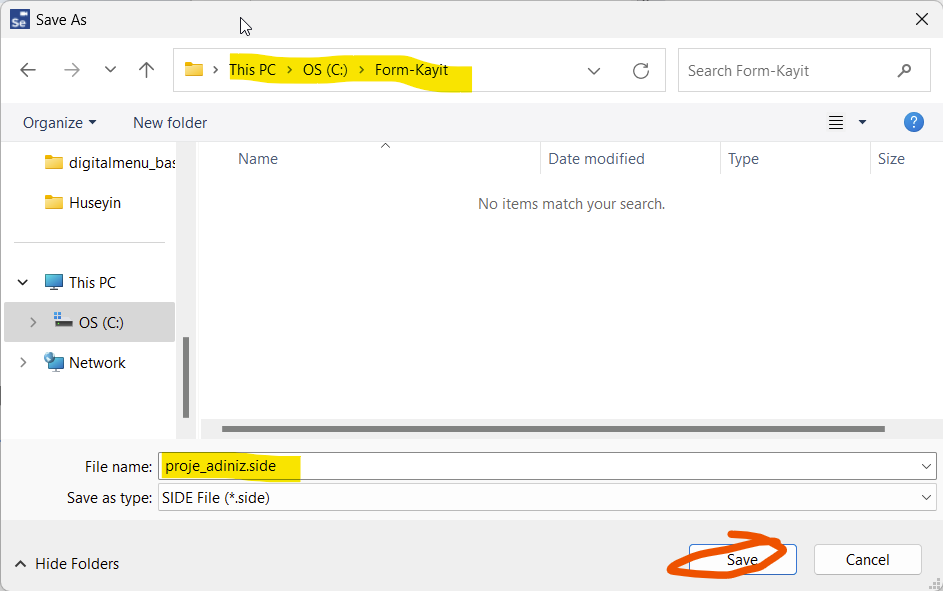
Select the folder you created for this purpose on your computer, check the file name and press the Save button.
Opening and Running a Test Record
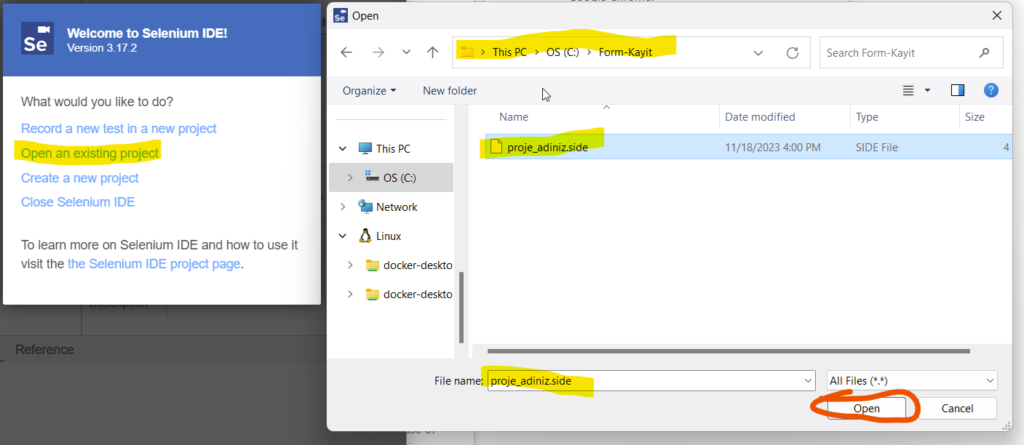
We open the recording file we made from the “Open an existing project” option.
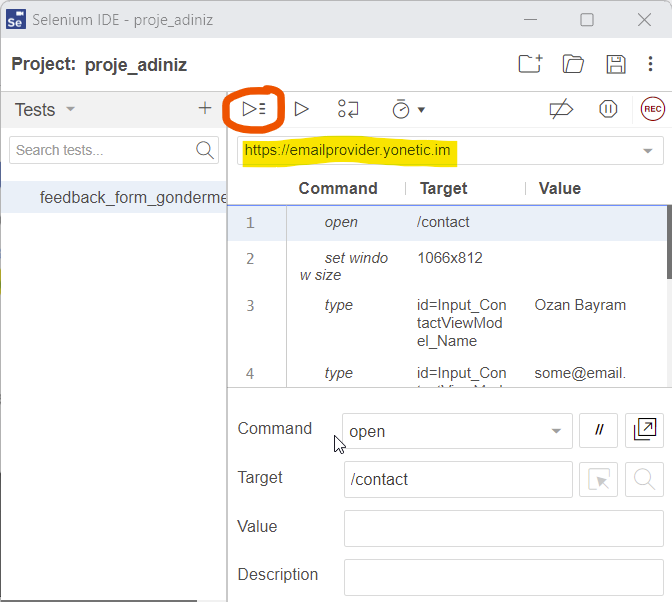
Click on the “Run All Tests” button. After this process, all operations performed during registration are automatically run, the form is automatically opened, the fields are automatically filled, the SEND button is automatically clicked and the submission is automatically completed.
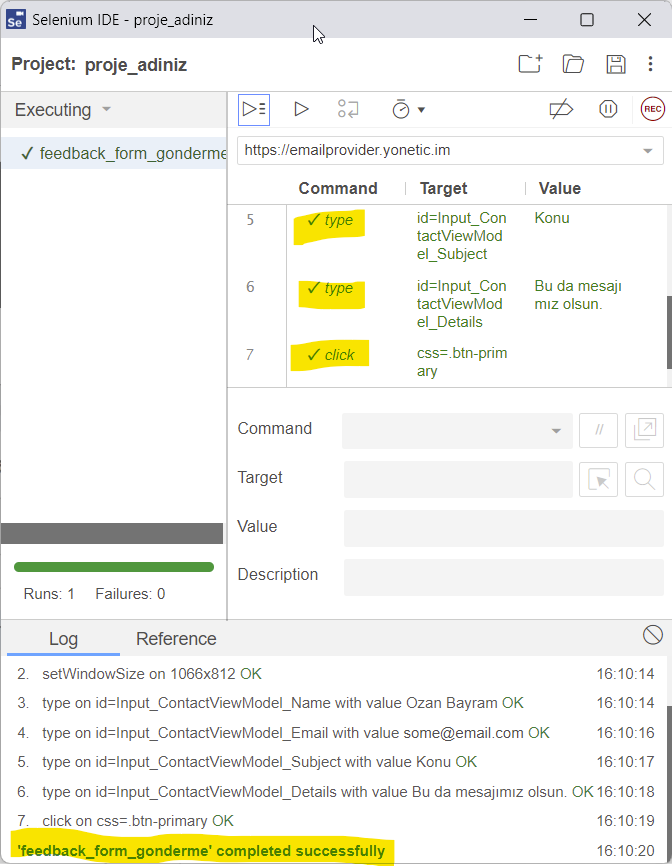
After the test steps are completed, success cases can be viewed on the screen.
If any, the documents used in the test steps are missing or the form subject to the test has changed may cause the tests to fail. In this case, it may be necessary to repeat the registration step and make a new registration.
Good luck 🙂